Showing posts with label DIY. Show all posts

Saturday, March 10, 2012

Homemade Jalapeno Poppers

With St. Patty's day approaching, we are starting to compile our list of great appetizers to kick off the day. This bite sized mix of salty, cheese, hot and green will make the perfect treat.

With only 4 ingredients, it is too easy :)

1 - 8 oz block of lite Philadelphia cream cheese
4 - cups shredded cheddar cheese.
10 -  Jalapeno peppers
1 - package bacon

First, preheat your oven to 375 degrees, set out the cream cheese so it can soften while you prepare the rest of the dish, and line a cookie sheet with aluminum foil. Next, wash the jalapeno peppers and cut in half long ways. Then core out the seeds with a spoon. The veins and seeds is where most of the heat resides,  but don't worry, these will still have a bite! 

*Remember while working with the jalapenos, keep your hands away from your face to avoid the sting of the jalapeno juice!

After the jalapenos are halved and seeded, you can begin mixing the cream cheese and cheddar cheese. Now that the cream cheese is soft, you can use a mixer on the lowest setting to mix in the cheddar cheese. I added about 4 cups to mine but add as much as you want! The cheesier the better ;)

Once you have your cheese mix, use a small spoon to fill your jalapeno halves and place on your cookie sheet.


Next, chop your bacon in half. I think it is easiest to cut it in half right out of the package.

Take the bacon halves and wrap one piece of bacon around your stuffed jalapeno pepper and stick with a tooth pick to keep it together.


Bake at 375 degrees for 25 minutes until the bacon is golden brown.


What green or St. Patty's day inspired treats are you making this year?

Enjoy!

Jes

Wednesday, February 22, 2012

Cheetah girls cheetah sistassss


Look what I did! I painted cheetah/ leopard whatever nails!

It was actually really simple. I painted the base a periwinkle and then dotted white spots followed by thin black outlines with a Sally Hansen paint pen.

Easy peasy! If you want, I can make a tutorial next time.

Nail obsessed,

Jes


Thursday, January 5, 2012

DIY: Hair Bow

My lack of skills are laughable.
I was going to wait to post this awesome hair bow post until I perfected it, but with my lack of hair skills that could be at least another year and it's too cute to NOT share!


What it is supposed to look like....This girl is a pro!


Check out the instructions and other hair ideas at one of my favorite blogs: A Beautiful Mess.


I admit I need some practice, but it kind of looks like a bow, right?!....


xoxox,

Jes

Tuesday, November 8, 2011

DIY: Newspaper Nails

My friend Devan came over the other night, (okay, I made this post a few weeks ago and forgot to publish it! I've been busy with work and my beautiful baby niece) and I fell in love with her nails!

Awesome, huh.


She painted her nails a pastel blue, dipped them in vodka and then layered on the newspaper. I had to know the details, so I searched Pinterest to find the step by step instructions:

Check out the Newspaper how to, HERE! I'm going to give it a try this weekend! Guess I better get to the liquor store ;)

xoxox, Jes

Sunday, October 9, 2011

Halloween Invisible Pops

Inspired by Halloween, I took to www.marthastewart.com for some party treat ideas. I found this recipe for homemade suckers that can be tailored for any occasion with the right candy decorations. I chose pumpkin and skeleton candies. The options are endless!

All you need is:
2 cups sugar
2/3 cup light corn syrup
Lollipop sticks
Assorted candies


Martha must have a steadier hand than I because my suckers didn't turn out very round.
The candy hardens quickly so you have to move fast!
Tip** Don't use your best pot to melt the candy mixture because it is tough to get out. The best way we found was to heat up the mixture again and again and pour it out onto the cookie sheet until it was all gone.

My friend Becca enjoying the treats she helped me make :)

Next time, I may try to add some food coloring to the candy mix to see what happens!


Enjoy! 

Monday, September 12, 2011

DIY: Spoon - Fork - Knife

Inspiration

Household Words on Etsy
Irell on Etsy


My Interpretation
How to:

As a kid, whenever we went to the hardware store, I would get lost in the paint section plucking up as many paint swatches as my little hands could hold. I used to cut them up, draw pictures and stare at the rainbow of colors for hours. And when we went to the fabric store, I would get my grubby mitts on the quilting squares. They are usually only 2 dollars a square and they are organized in the store by color, so I have always been drawn to them. Well, some things never change, and I had 3 brightly colored quilting squares that I had no clue what to do with. I also conveniently had 3 small canvas that I also had no clue what to do with.

I have been inspired by prints lately, and decided to make my own humorous, spin on cute Spoon - Fork - Knife paintings for the kitchen :)


Supplies and sketches


I think a staple gun would have made more sense but I didn't have one and I am too impatient to wait so I used a glue gun. It gets the job done!

Make sure to glue opposite ends of the canvas to make sure the fabric is tight, before moving on to the  next side.

The final result!
What do you think?!

If you have more questions for me about how to make your own Spoon - Fork - Knife paintings, or if you would rather me make them for you, email me at Jbarmstrong87@gmail.com. I would love to hear from you!

Monday, January 17, 2011

Do It Yourself: Mosaic Plate Mirror

I wish I could take credit for this one, but this idea was originally my brother-in-law's mother's idea. She is super crafty and inspiring. My sister created her first mirror about 2 years ago and I have been dying to make one ever since.

This is one of my favorite projects because not only is it easy, but it helps you take out some aggression with a hammer :)

So first, you need to get thrifty and find a mirror and some old plates that match your desired color scheme. (It's fun to recycle someone's old things! Trash to treasure right?!) I decided to pick up the fun colors in my bedspread.

*Make sure your mirror has a relatively flat frame and enough room for you to get crafty with plate placement. It doesn't matter if the frame is "ugly" because you will never see it.


After you get your materials, put a few plates at a time into a paper bag. *For your safety, make sure to wear work gloves so that you do not cut yourself and work goggles to protect your eyes just in case. Next is the fun part, HAMMER TIME! Check periodically to make sure you are smashing the plates to the desired size for your mirror.

After you have all of your plates smashed and ready, use grout mix or mosaic tile mix to apply the plate pieces to the frame of the mirror. I usually place the rounded edge pieces of the mirror around the edges so that there are no points around the edge.


Let dry, and TADAaa!

Another tip, *If you don't like the white grout, you can use tea bags to stain the grout to an off-white color. This is really great for antique style mirrors. Also, you can add beads, antique brooches, etc;

The options are endless and no two mirrors will ever be the same!

Thursday, December 16, 2010

Do It Yourself: Jewelry Tree

I have been wanting a Jewelry Tree ($70?! Really?) for a long time... I had my sights set on a white metal tree from Urban Outfitters for about $35 and then I thought... I can just make this myself!

I found the perfect branch and just screwed it tight onto a wooden base I bought at Michaels Craft Store for only $3.


Viola!
Super easy right?! And rather than a manufactured "tree," your Jewelry Tree will be one of a kind! Right now, my Jewelry Tree is natural but I may paint it with some white gloss paint for strength. So far though the branches are holding up just fine! It complements my natural Origami Crane Mobile well too! :)

*please note: I am too poor to buy a camera for the moment so my Droid camera will just have to do

Tuesday, October 12, 2010

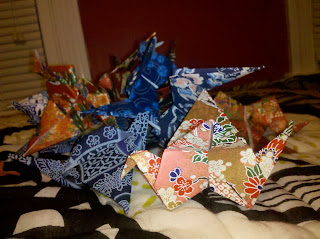
Do It Yourself: Origami Crane Wind Mobile

In an attempt to mix my appreciation for Asian culture/art with country decor, I made this origami crane wind mobile.

I tried to take pictures along the way but as you know, my Droid's 5 megapixel camera just isn't impressive.. hopefully, I'll get a new digital camera soon.

Pretty origami paper :) I got mine at Paper Source
Folding instructions: Origami Crane


After I made the cranes, I took fish line and small silver beads and thread them through the cranes to make the strands the length I wanted without worrying about the cranes moving. Then, I tied the strands onto sticks and hung onto a hook in the ceiling.


So easy!
Related Posts Plugin for WordPress, Blogger...